Bob's MG Midget Website


An Electronic Fuel Injection Conversion

Update 4th Dec 2006 Click Here or see below

The old SU carbs on a Midget are pretty reliable and fairly simple but have some inherent drawbacks in terms of performance. I did try going for Weber 40's but these come with their own difficulties with tuning and low speed running. I toyed with engine swaps and the K series conversions but wrote off the idea due to cost.

Then I got to thinking "Wouldn't it be good if you could fit a modern EFI system to an original engine?". So what can I do? None of the ECU's fitted to modern engines would suit an old 1500 Triumph engine designed in the 1950's without serious electronic modification. What I really needed was a completely mappable system that can be tuned to suit anything.

I looked at the Emerald systems and the Jenvey systems but although very well engineered, these work out very expensive and would total to around £1500 to £2000 for a system to fit my car! Besides, they are far too sophisticated for what I needed.

..... and then I found the Megasquirt website.

This is a simple efi system designed by two guys in the US by the names of Bruce Bowling and Al Grippo. The concept of this is to provide enough info to allow people to build the system themselves from scratch by way of a shared knowledge base of some very clever engineers.

So this is how I went about the job of putting the system together.

The System
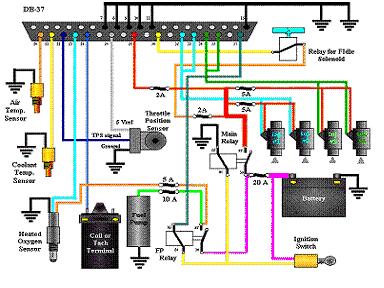
The whole system is laid out in this picture showing the whole of the fuel and wiring layout. The 37 pin D-Sub plug is the main connection to the fuel system and sensors on the car.


ECU (The Brain)
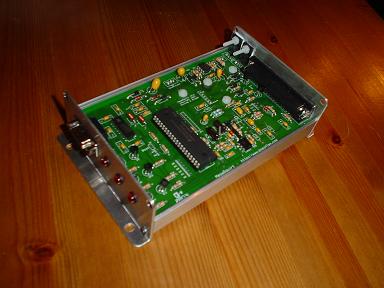
Every EFi system needs an electronic control unit and for the Megasquirt system, this is it. It took me about 8 hours to build and test it in total but was worth it for the final result. Much thanks to Bill Shurvinton who supplies the kits in the UK. Please email me if you would like to contact him and I will forward your details.


Injectors
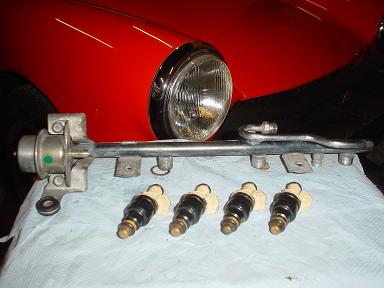
The business end of the system. A fuel pressure regulator is mounted on the end of the rail which is originally from a Volvo 240 Turbo. The injectors are from a Rover 216 which should provide the right amount of petrol for around 100-110bhp, my eventual target out of the little 1500.


Manifold
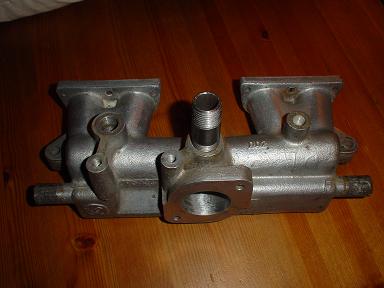
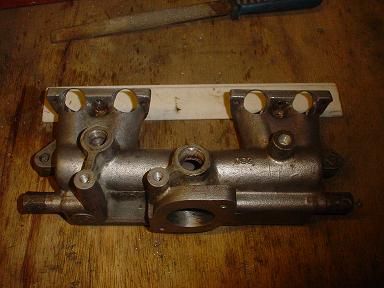
This manifold is from an American spec Midget 1500 using a 1.5" Stromberg. It is ideal for my purposes as it perfect for mounting a single throttle body. At 38mm the inlet is somewhat small but can be opened up quite a bit to fit the 55mm throttle body to be fitted. The injectors will be fitted into the manifold as close to the head as possible so that the fuel can be squirted direct into the ports on top of the valve heads. This should maximise the low speed throttle response.


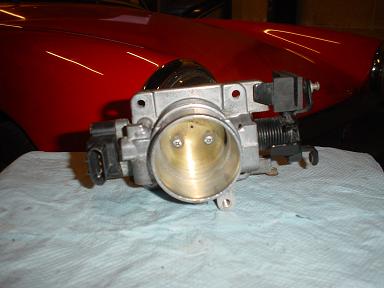
Throttle Body
This is from a Mondeo V6 ST24 and measures 55mm at the butterfly and 60mm at the inlet. I have smoothed it off and tapered the inlet to form a bellmouth.


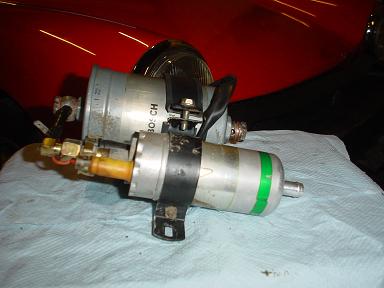
Fuel delivery
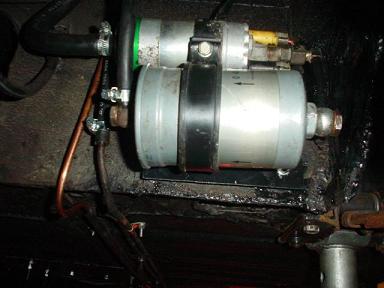
This pump and filter assembly is from a Volvo 740. It fits the bill nicely as it will produce 3 bar+ and is a neat package to bolt up under the car. A swirlpot may be needed but for the meantime I shall just pump it straight up to the fuel rail.


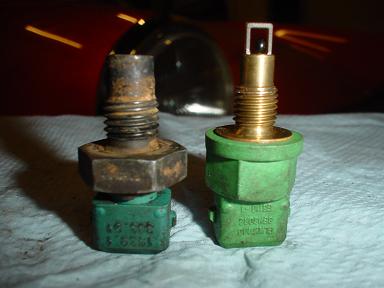
Sensors
On the left is a water temperature sender and on the right is a manifold air temperature sender. These will tap into the right spots and provide the right feedback for the ECU. Both taken from a VW.


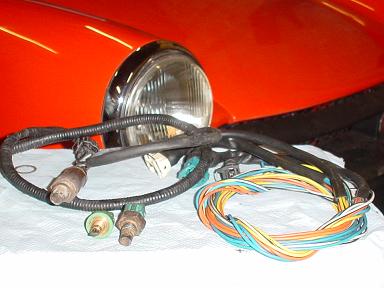
Wiring
The Bosch ECU wiring loom comes from the same volvo as the fuel rail. It needs some serious splicing but will allow everything to be connected up. The lambda sensor is the exception which came from a Rover 820 in A1 condition.


Manifold prepared
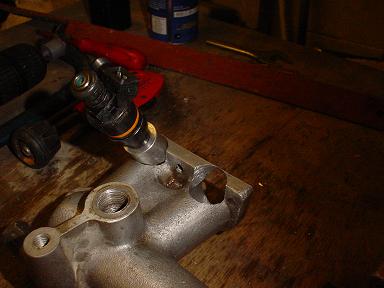
The manifold after it had been machined to take the injectors. Gaping great 'oles in the alluminium were a bit offputting but necessary to fit the pockets to be welded in.


Injectors 2
Using some old injectors for testing, this shows the general arrangement of an injector placed in the machined holes. It is almost 45° to the gasket face and as sharp an angle as possible without fouling the connections needed, of course, it is still yet to be welded up so the fun has not really started.


Injectors 3
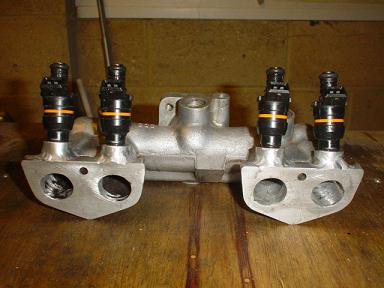
The injectors seen from the gasket face - the pockets still need machining to match the manifold ports but it does give an overall impression of the fueling. Although I have failed to inject direct into the intake port as originally intended the fuel should still have a good route and
provide a good mixture and throttle response.


Injectors 4
After the welding was completed by a professional (my attempts ended in blood, sweat and tears - but no weld) it all looks really smart. The injectors line up quite well and in a good position for direct port injection.


Injectors 5
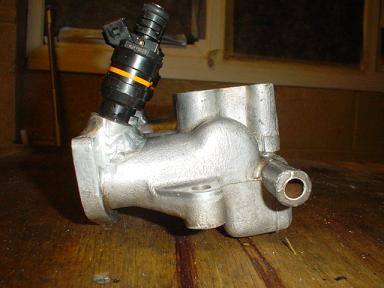
This picture shows the side view of the injectors and the angle into the port. As I mentioned earlier, it is not quite a perfect 45° but close enough. A perfect line up though - not bad for setting out by eye. Hmm, I think that water jacket needs a good clean out.


Fuel Rail Design 1
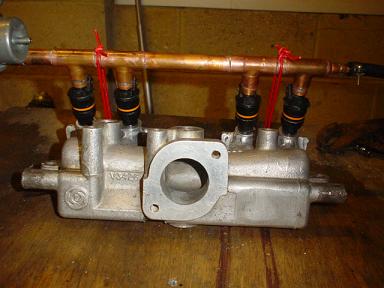
My first attempt at an alternative fuel rail design using some 15mm copper tube and fittings. To test it I first pressured up with compressed air to 3 bar and it blew straight off and hit the ceiling of the garage. Here you can see the rail secured to the manifold by some wire to stop it blowing away again, brackets come later. After I tried the air I then used the efi pump to pressure it up to 3 bar using water (petrol seemed a bad idea by then!). I left it to recirculate for 2 hours to test and it held pressure fine so it looks like this system could be a go-er. The system was pressured up when this picture was taken with no sign of any leakage.


Fuel Rail Design 2
This is an alternative design fuel rail based upon 12mm steel tube and utilising the injector caps from the Volvo rail. The caps were welded onto the tube and constructed using MIG welds. Unfortunately it was an embarassing mess and I refuse to show it!


Fuel Rail Design 3
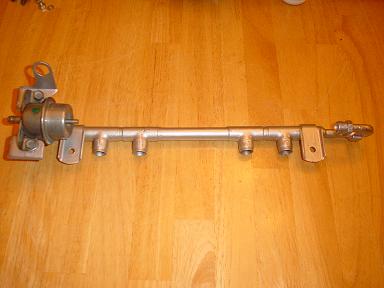
Well, this is it! I've messed about with a few different designs now and it seems that the original copper was the best. I've now brazed it all together and fitted the brackets to secure it and fit the regulator. After painting with some silver hammerite it doesn't look too awful either.


Completed Manifold System
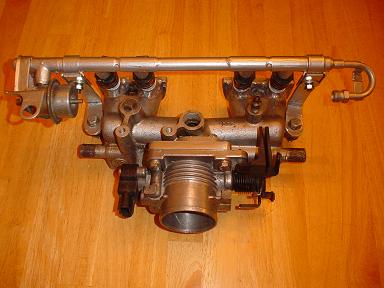
After the fuel rail was fitted using some purpose built ally plates an adapter was fabricated to mount the throttle body. It all bolted up easily and is ready to fit to the car.


Completed Manifold System (Continued)
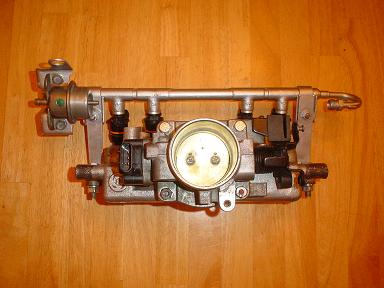
This view gives a much better idea of the size and layout of the intake and rail. The rail is secured by the fabricated brackets at either end of the manifold, you can also see the fuel intake with a threaded connection on the right of the picture. It is all very compact and should allow for air to flow freely around it for cooling.


Injector Pump Fitted
Here you can see how I've mounted the EFi pump on the rear bulkhead. I left the original set up of the pump and filter as the filter is a very efficient and standard unit. It's mounted onto a plate which is suspended on four rubber exhaust mounts. This works very well at preventing the vibration through the body.


Relay Box
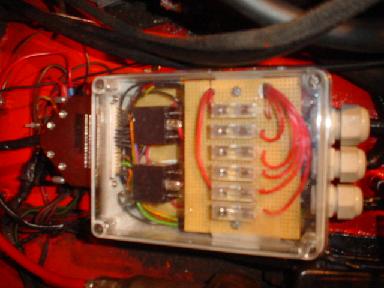
Rather than use the relay unit designed by the Megasquirt engineers, I wanted to come up with a unit which could run all items in a single waterproof box local to the main fuse box. The main ECU is mounted on the top of the passenger footwell. This also makes it easier to plug into for tuning as a passenger!


Engine Bay as Fitted
All of the bits have been fitted onto the engine and it is now up and running. As you can see, it's all a bit untidy with bits of tube and wires everywhere. It does work though which is the main thing.

Click on the picture to see a video of the engine running.

(Needs Quicktime Player)


Megatune
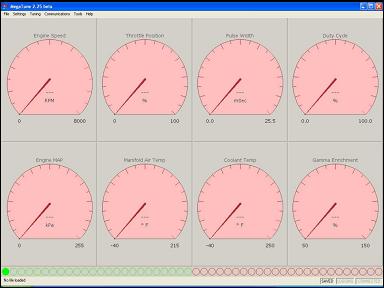
This is a screen shot of the tuning software used to tune the ECU in Megasquirt. It allows you to look at all of the relevant info simultaneously and make changes during run time. Settings used can also be logged whilst running in order to analyse them later and make the relevant changes.


VE Tuning
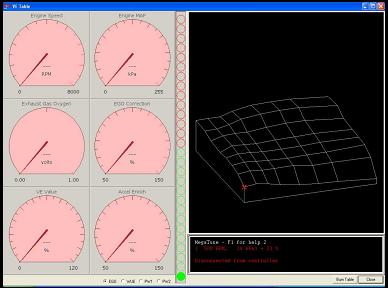
The heart of the ECU tuning is the VE table which matches engine speed against the manifold air pressure and so allows different settings to be achieved for the various engine conditions. Again, the settings and changes can be made during run time so if you can find someone to drive your car, you can make the changes from the passenger seat whilst on the road.


Update 4th December 2006

A New Manifold
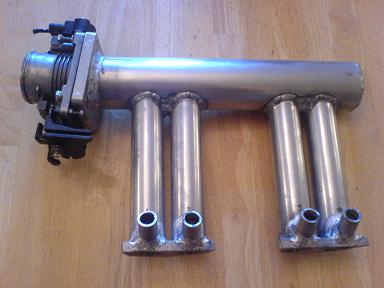
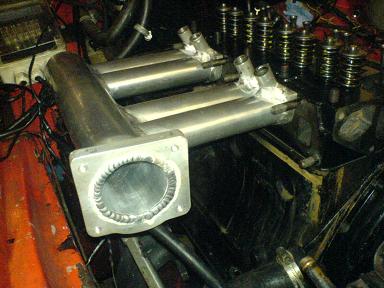
After a disappointing session on the rolling road and a disastrous engine failure (put down to faulty rings and stuck valve) I decided to rebuild the engine and fabricate a new manifold. The RR figures showed a top output of only 74bhp BUT a torque of 106lbft. Since the bhp started to plateau at around 4000rpm instead of rising to 5500rpm (as with Webers) it pointed to a lack of airflow. All of the pieces were cut to size and TIG welded by my mate at Alpha Welding. It is shown here with the throttle body fitted ready to be offered up to the engine.


Injectors and Runners
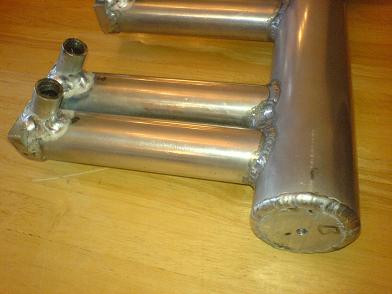
Due to the lack of space under a Midget bonnet the runners leading to the head cannot be tuned to size. For peak power at around 5500rpm they should be about 11" which is just impossible so I just made them as long as possible at 7" which should be sufficient to regulate the turbulent flow from the plenum.


Throttle Body
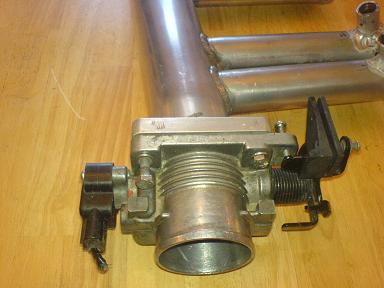
The throttle body fitted to the earlier manifold ahs been re-used. It is plenty large enough at 55mm and good for well over 100bhp. Mounted at a slight angle in order to direct the intake past the rad, it throws the airflow toward the runners. Let's hope that it doesn't have an adverse effect.


Down the Breathing Hole
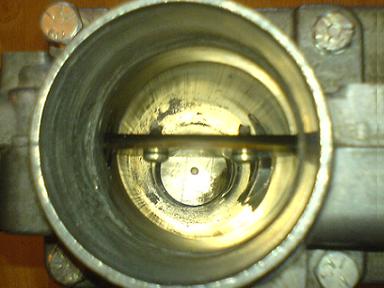
You will see from this shot that the TB gives a good clear passage into the plenum and thus into the runners. At 55mm the TB is only a marginally smaller diameter than the plenum at 58mm. The birdsmouths of the runners are not perfectly in line but again, I'm hoping this will not affect things too badly. Bloody expensive to get it machined level!


First Fit
A trial fit to see how it goes into place. The weld was not yet machined off the gasket faces or the injector pockets cut & reamed to size but it does give an overview to the the end install.


As Installed
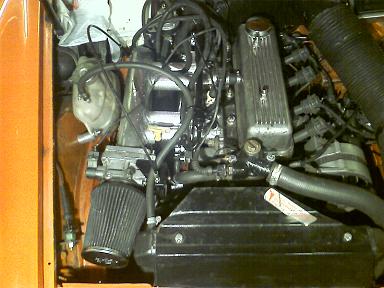
This is a view after the manifold was fitted and shows the full install including the EDIS setup for the ignition. All systems running off the Megasquirt ECU. It is due for a visit to the rolling road soon so I will get the results posted up here - it sure feels a hell of a lot quicker!


That's about it for now, I am carrying on with the design as I go.

Drop me a line if you want: mgbob@amphibia.co.uk

For more information on these systems check out the Megasquirt web site

www.megasquirt.info


A link to my company website

http://www.amphibia.co.uk/

Experts in legionella and control of legionnaires disease